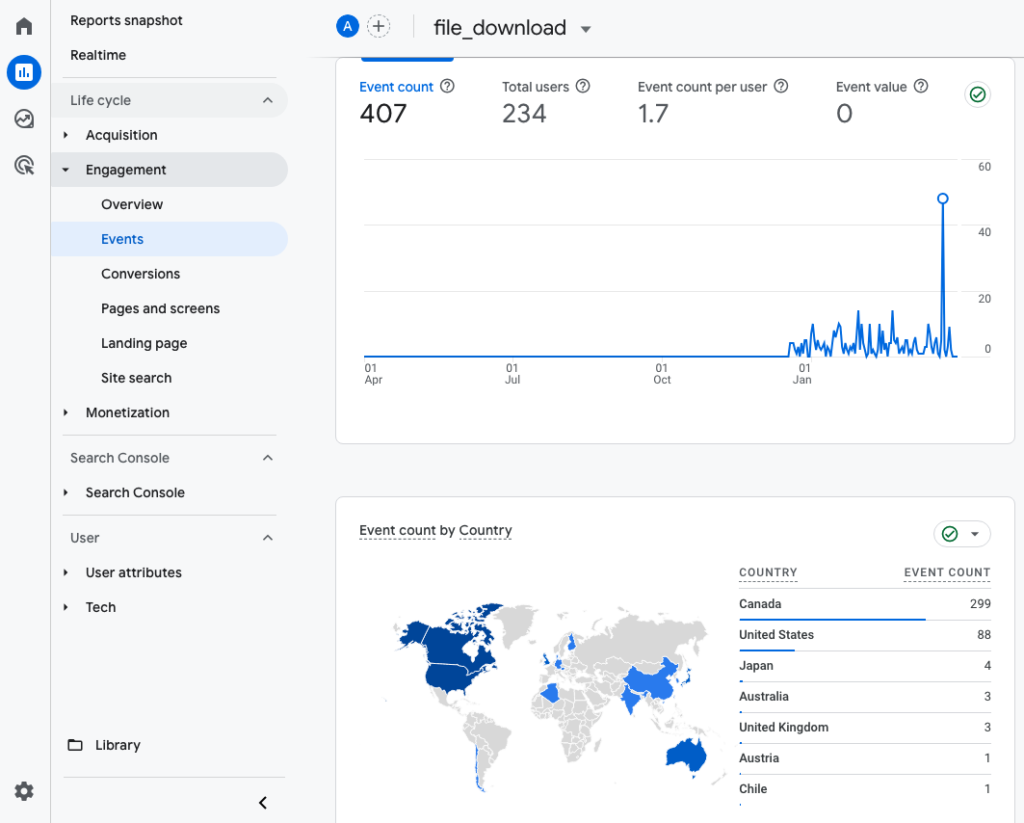
The default GA4 Engagement > Events report does offer a way to drilldown to see file_downloads. But, like the drilldown for click, there is key information missing.

Want to know which files were downloaded? Take the following steps to enhance your file downloads report.
- From the Reports section, click on Library (bottom left). Next click “Create new report” then “Create detail report.” Select “blank report.”
- On the right, click on Dimensions and add “File name” and “File extension”, then click Apply.
- Next click on Metrics and add “Event Count” and click Apply.
- In the upper right, “Save” this report and call it something like “File downloads.”
The resulting report is almost done. You will notice that the first line of the report has no filename but a whole bunch of events counted, whereas the following lines actually show filenames and event count (aka number of downloads). Basically this report is an All Events report in disguise. Because we used “File name” as the dimension, it is showing us events with a filename. Every event without a filename is being rolled up into that first row.
You can use this report as is and add it to one of your published Collections. Or you can create a custom metric called “Downloads” and use that instead of “Event Count.”
Here’s how to add the good-enough report into the left-hand navigation so it’s easy to access.
- Click on Library (bottom left). Find the Life cycle collection box, and click on “Edit collection.”
- Scroll to find the report you just created, or use the search box. Drag the report from the right column into the left column under Engagement.
- Click “Save”, then “Save changes to the current collection.”
Now you will see the File Downloads report under the Engagement section in your Reports menu.
Want to remove that top line of non-file_download events? To do that, you need to make a Custom Metric, then edit the report you just created.
Here’s how to add a Custom Metric “Downloads” that can replace “Event Count” in your File downloads report.
- Go to Admin and click on Events.
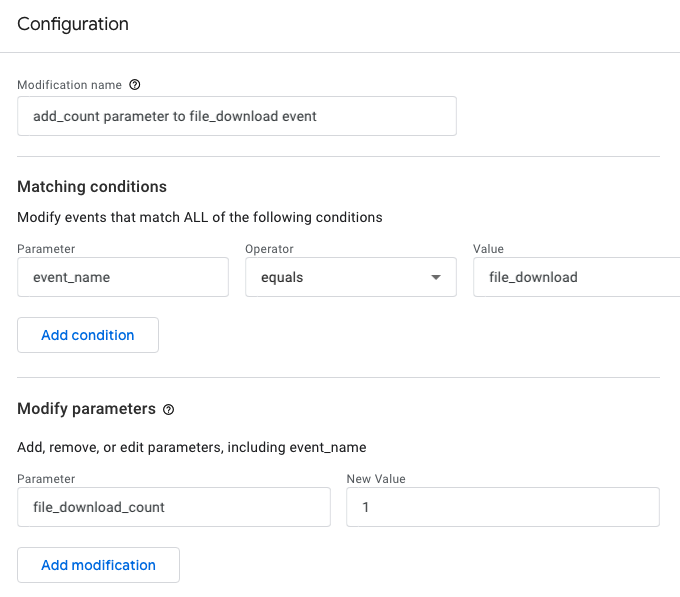
- Click “Modify event” and then “Create.”
- Enter the below values and click “Add modification.”

What you are doing in the above step is modifying the file_download event by adding a parameter that records a value of “1” each time a file is downloaded. We can then use that parameter to create a custom metric called “Downloads”.
Ready? Next step is to create that custom metric.
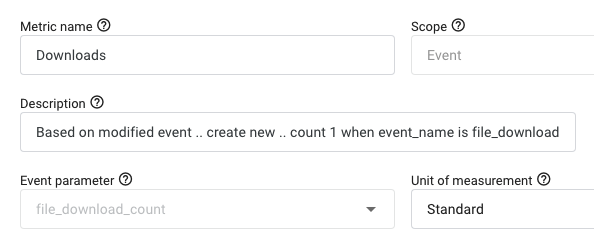
- In Admin, click “Custom definitions.” Select “Custom metrics” and click “New custom metric.” Set up the metric with the details in the screenshot below. (Metric name: Downloads. Scope: Event. Event parameter: file_download_count.)

Almost there! Now, you want to swap “Event Count” for “Downloads” in the report you created.
- Go to Reports > Engagement > File Downloads and click the pencil icon in the upper right.
- Click on “Metrics” and then “Add metric.” Select your custom metric “Downloads.”
- Remove “Event Count” by clicking the “x”.
- Click “Save” and “Save changes to current report.”
Ta da! Now your report shows file names and the number of downloads.
Want to enhance your Engagement > Events > click report to see what outbound URL was clicked? Here’s how.


